4. Configuration
4.1. intertechno.conf
The configuration file for the Intertechno module, intertechno.conf, can be found in Homegear’s family configuration directory (default: /etc/homegear/families). In this file, you can configure the communication modules used to communicate with Intertechno devices.
4.2. Communication Modules
4.2.1. Overview
The Intertechno module supports the following communication modules:
If you want a system that works without your having to invest a lot of time, we suggest buying the CUL stick. Of the devices in the list above, it is probably the easiest to use.
4.2.2. CUL
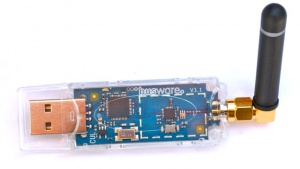
The CUL from busware is an easy to use USB stick to communicate with smart home devices.
4.2.2.1. Downloading the Prerequisites
Warning
To receive Intertechno packets you need to flash the “Alternative culfw (a-culfw)”.
In order to be able to flash the CUL, you need to install dfu-programmer. In Debian, just run:
apt-get install dfu-programmer
4.2.2.2. Flashing the Firmware
Download the firmware with the link found in the README.md from GitHub and extract it:
unzip a-culfw*.zip
Switch to the directory with the CUL firmware:
cd CUL
Now press the PROGRAM button on the back side of your CUL, and keep it pressed while you plug the CUL in. The green LED should NOT be flashing. Then run the script “flash.sh”:
./flash.sh
Unplug your CUL, then plug it in again, and you are done!
4.2.2.3. Configuring Homegear to Use the CUL
To tell Homegear to use the CUL, insert the following lines into intertechno.conf:
[CUL]
id = My-CUL
# Uncomment this if you want this CUL to be your default communication module.
#default = true
deviceType = cul
device = /dev/ttyACM0
baudrate = 57600
Of course, you can use multiple CULs with Homegear.
4.2.3. COC/CCD/SCC
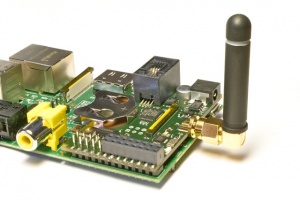
The COC from busware is a Raspberry Pi extension that is used to communicate with wireless home automation devices.
4.2.3.1. Downloading the Prerequisites
In order to be able to flash the COC, you need to install avrdude. In Debian, just run the following command:
apt-get install avrdude
4.2.3.2. Free up Serial Line and Enable UART
4.2.3.2.1. Raspberry Pi 1 and 2
On the Raspberry Pi 1 and 2 ttyAMA0 might be used by the serial console. To free it up do the following. On the Raspberry Pi 3 ttyAMA0 is used by Bluetooth and UART now is available over ttyS0.
Remove any references to ttyAMA0 from /etc/inittab and /boot/cmdline.txt.
Our /boot/cmdline.txt looks like this:
dwc_otg.lpm_enable=0 console=tty1 root=/dev/mmcblk0p2 rootfstype=ext4 elevator=deadline rootwait
Disable the serial interface in Raspbian Jessie:
systemctl disable serial-getty@ttyAMA0.service
4.2.3.2.2. All Raspberry Pis
Make sure enable_uart=1 is in /boot/config.txt. Our file looks like this:
arm_freq=900
core_freq=250
sdram_freq=450
over_voltage=2
enable_uart=1
dtparam=spi=on
dtparam=i2c_arm=on
Reboot the Raspberry Pi.
Warning
If you’re using the official Raspbian, you need to delete the file /etc/udev/rules.d/99-com.rules for Homegear to be able to access the GPIOs.
4.2.3.3. Flashing the Firmware
Download the firmware with the link found in the README.md from GitHub and extract it:
unzip a-culfw*.zip
Switch to the directory with the COC firmware:
cd COC
Execute the script “flash.sh”:
./flash.sh
4.2.3.4. Configuring Homegear to Use the COC/CCD/CSM/SCC
To tell Homegear to use the COC, insert these lines into intertechno.conf:
[COC/CCD/CSM/SCC]
id = My-COC
# Uncomment this if you want this device to be your default communication module.
#default = true
deviceType = coc
device = /dev/ttyS0
responseDelay = 95
gpio1 = 17
gpio2 = 18
Warning
If you’re not using a Raspberry Pi 3 replace ttyS0 with ttyAMA0. On the Raspberry Pi 3 ttyAMA0 is used by Bluetooth.